


Construction
In a Post Frame Building, Bad Compaction Does Not Fail the Building. It Fails the Floor.
Your columns bear below frost on undisturbed soil. Your slab bears on the fill you placed. That split means a compaction failure gives you a structurally sound building with a cracked, settled floor inside it, and the floor is the expensive one to fix.
American Barndos Editorial — August 21, 2026 — 11 min read
Start here
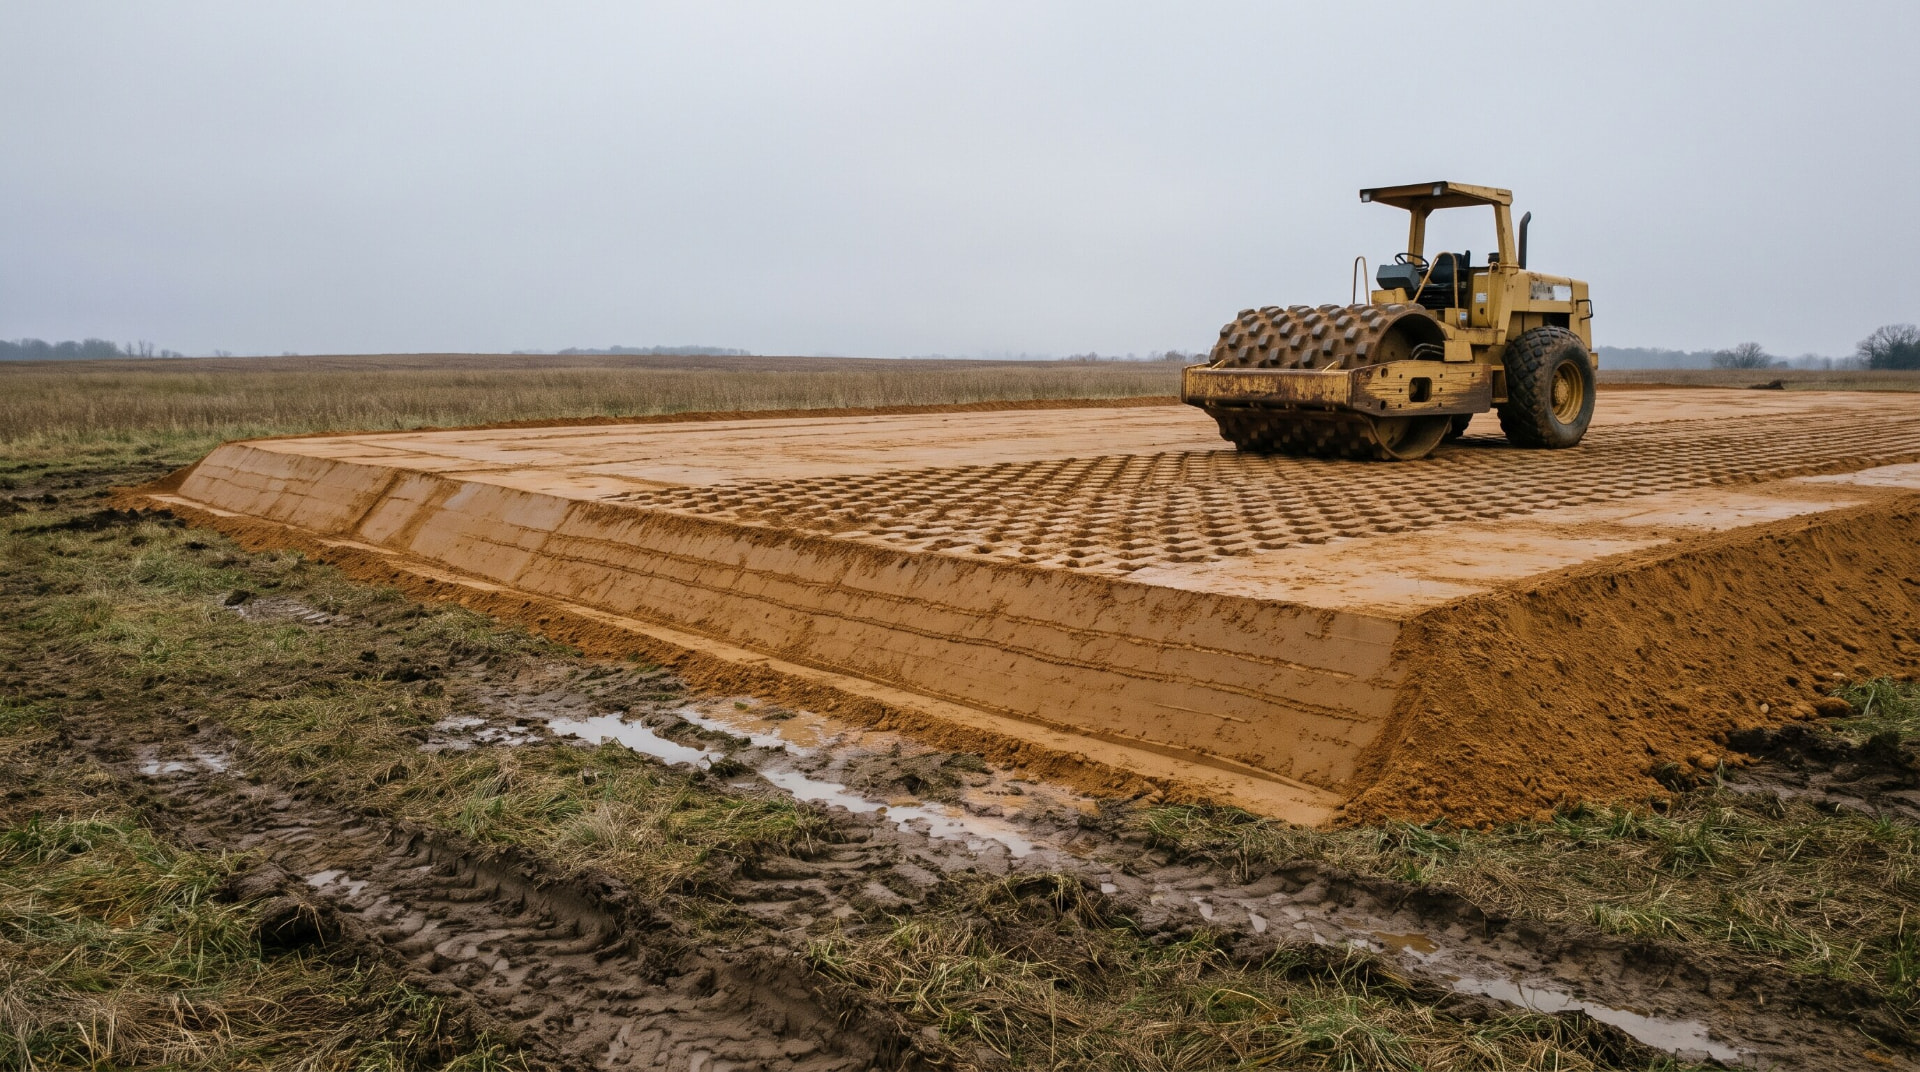
Most people hear "building pad" and picture a foundation. It is not one. The pad is the engineered platform of compacted fill that the building sits on and the slab bears on. In a poured basement or a continuous footing house, the pad and the foundation are close to the same conversation.
In post frame they are two different conversations, and understanding the split is what makes the rest of this article useful.
A post frame building carries its load on columns. Those columns sit in augered holes on footings placed below the frost line, which means they bear on undisturbed native soil at depth. Whatever fill you brought in is above that. The columns do not care about your compaction.
The slab does. The slab bears entirely on the fill you placed, and the slab is what everything you own sits on.
That divide sets up the failure mode this whole article exists to prevent: a building that is plumb, square, and structurally fine, sitting over a floor that has settled, cracked, and thrown the interior partitions out of level. The shell is not the expensive part to fix. The floor is, because fixing it means removing what is on top of it.
This article covers why the pad exists, what goes in it, how it is built and verified, and where post frame construction creates a settlement risk that stick built construction does not. It does not cover slab thickness, reinforcement, or vapor barriers, which have their own article, and it does not cover the site prep sequence, which has its own too.
The pad's first job is drainage, not strength
Before it is a bearing surface, the pad is a water management device, and the code is specific about what it has to achieve.
Under IRC R401.3, the ground has to slope away from the foundation on all sides. The requirement is 6 inches of fall within the first 10 feet, which works out to a 5 percent slope, stated in the code as one unit vertical in 20 units horizontal. Past that first 10 feet, a minimum 2 percent slope has to be maintained to the lot line, a swale, or a drainage facility.
On a sloped site you may already have that. On the flat rural ground where a lot of barndominiums get built, you do not, and the only way to produce 6 inches of fall in 10 feet on all four sides is to raise the building above the surrounding grade. That is what the pad is for.
Which means pad height is not a preference. It is derived from the grade around it and the fall the code requires. Decide it with the drainage in hand rather than picking a number because it sounds like enough.
Two practical consequences of getting it wrong. Too low and you have built a bowl that collects water against a slab on grade, permanently. Too high and every additional foot costs you a full extra layer of fill across the entire pad footprint, which is the single largest swing in the whole line item, as the arithmetic below shows.
What goes in it
Not all dirt is fill, and the distinction is not cosmetic.
Acceptable fill meets the gradation and plasticity limits your engineer specifies for the site. Granular material is easier to compact reliably and drains better.
Unacceptable, in every source that addresses it:
- Topsoil with high organic content. Organics decompose, and the volume they occupied becomes void.
- Expansive clay without proper moisture conditioning. This is the shrink swell problem, and it belongs in the soils article, but it disqualifies the material here too.
- Debris of any kind.
- Fill with large void spaces.
The temptation on a rural build is to use what is already on the property, or to take free fill from a neighbor's excavation. Sometimes that is fine. Sometimes it is topsoil and construction spoil with a load of broken concrete in it, and you will not find out until the floor tells you two winters later. Free fill that fails a Proctor is the most expensive dirt on the job.
What it costs, 2026
| Material | Per cubic yard | Per ton | Per truckload, 10 to 14 cubic yards |
|---|---|---|---|
| Standard fill dirt | $5 to $25 | $4 to $15 | $150 to $250 |
| Clean fill dirt | $8 to $25 | $6 to $15 | $200 to $300 |
| Structural or engineered fill | $10 to $30 | $8 to $23 | $250 to $400 |
| Sand and gravel mix | $15 to $25 | — | — |
Delivery commonly runs $50 to $150 per trip, often free within about 5 miles, with roughly $10 per mile beyond that. Spreading labor is commonly quoted at $200 to $400. Minimum orders are typically 2 cubic yards, though some suppliers require 10 to 20.
One thing to ask your supplier that nobody thinks to ask: the shrink factor. Material compacts to less volume than it occupied loose in the truck, so the compacted cubic yards you calculated are not the loose cubic yards you have to order. Get that number for the specific material before you order, or you will be short on the last lift and mixing in a second material, which is its own problem.
How it actually gets built
Three variables, and all three get checked.
Lift thickness. Fill goes down in layers, not in one pile. Most specifications require a maximum of 6 to 8 inches loose for fine grained soils and up to 12 inches for granular material before compaction. Placing thicker than that means the compactor's energy never reaches the bottom of the layer, and you end up with a dense crust over a loose middle that tests fine at the surface and settles anyway.
Moisture. Soil compacts best at a specific water content, called optimum moisture content, determined in the lab. Too dry and the particles will not move into place. Too wet and the water carries the load instead of the soil. Crews adjust with water trucks or by drying and turning the material. This is why compaction work stops in the rain and why a wet fall can hold up a pad for weeks.
Density. The target is expressed as a percentage of a laboratory maximum. For residential work the number you will see most often is 95 percent of Standard Proctor density. Geotechnical reports commonly specify building pads in a 90 to 95 percent Standard Proctor band, against 98 percent Modified Proctor for road base course and 90 percent Standard for general earthwork fill.
The Proctor number, and why "95 percent" is two different numbers
The Proctor test establishes maximum dry density and optimum moisture content for your specific soil in a lab, and that becomes the reference for every field test on that material. There are two versions, and they are not interchangeable.
| Standard Proctor, ASTM D698 | Modified Proctor, ASTM D1557 | |
|---|---|---|
| Compaction energy | 12,375 ft-lbf per cubic foot | 56,250 ft-lbf per cubic foot |
| Hammer weight | 5.5 lb | 10 lb |
| Drop height | 12 inches | 18 inches |
| Layers and blows | 3 layers, 25 blows each | 5 layers, 25 blows each |
Modified Proctor applies roughly four and a half times the energy, so it produces a higher maximum dry density and a lower optimum moisture content on the same soil. 95 percent of Modified is a materially denser, harder to achieve target than 95 percent of Standard.
So a spec that says "95 percent compaction" without naming the test is not a spec. Get the test method in writing before anyone quotes the work, because a contractor pricing against Standard and an engineer expecting Modified is a dispute waiting to happen on the day the results come back.
The part nobody writes about: post frame splits the load path, then punches holes through your pad
Two things happen in post frame construction that do not happen in a conventional build, and both of them concentrate settlement risk in exactly the place you will notice it.
One: the failure has nowhere to show up except the floor.
In a stick built house on a continuous perimeter footing, the structure and the floor share a foundation. Settlement moves both, and the building tells you early, in doors and windows and drywall cracks at the corners.
In post frame the structure is on columns bearing at depth and the slab is on fill. Settle the fill and the building does not move at all. What moves is the floor, and everything sitting on it: interior partitions framed off the slab, cabinets, door jambs, the shop equipment you leveled once. The published symptom list is consistent across sources, and it reads like a list of things people blame on other causes: cracked slabs, floors that become unlevel, doors that stop closing.
The reason this is worse than it sounds is repair access. A settled slab under a finished interior is not a slab problem you fix. It is a demolition project you fund.
Two: the column holes get dug through the pad after you compacted it.
Think about the sequence. The pad goes in, in lifts, tested and signed off. Then the auger comes and drills two dozen holes straight down through it for the columns. Then those holes get backfilled around the columns.
That backfill is rarely placed in 6 to 8 inch lifts and rarely tested to 95 percent of anything, because it is a two foot diameter hole and nobody is running a sheepsfoot roller in it. Which means you now have a well compacted pad with a grid of less compacted cylinders through it, positioned precisely where the slab meets the columns. Differential settlement between the two shows up as cracking radiating from column locations.
This is a known, solvable problem. It is solved by specifying how column backfill gets placed and compacted, and by using flowable fill or concrete backfill around columns where the engineer calls for it. It is not solved by hoping, and it will not be in the scope of a pad contractor whose work was signed off before the auger arrived. Ask the question at the point where those two trades hand off to each other, because that handoff is where it falls through.
Testing, which is the only thing that makes any of this real
Compaction you did not test is compaction you are guessing about. The surface looks identical either way.
Frequency. Published requirements run one test per 2,000 to 5,000 square feet per lift, tightening to one test per 1,000 to 2,000 square feet per lift in critical zones such as foundations and retaining walls, with at least one test per lift in each distinct fill area.
Method. Nuclear density gauges are the most common field method, with the sand cone test as the alternative. The gauge contains a radioactive source, so it requires an NRC license and must be operated by a certified technician. This is not something your excavator does with his own equipment.
When a test fails, the sequence is defined and it costs schedule: stop work in the affected area, scarify, adjust moisture, add roller passes, and retest the same area. On repeated failures the geotechnical engineer evaluates whether the soil is suitable at all and may call for replacement, moisture conditioning, thinner lifts, or heavier equipment.
Documentation. The report your building department wants includes project identification, date and time, test location, the lift it represents, density and moisture results, pass or fail, and the technician's name and certification number. That daily field report is what supports grading certification and foundation inspection sign off. Keep every one of them. They are also the only evidence you will have if a floor problem turns into an argument years later.
Testing is priced by the testing firm rather than published as a national rate. Ask for a per visit rate and an estimate of visits based on your pad area and lift count, and get it before the fill is ordered rather than after.
Running the numbers on a real pad
Take a 60 by 80 barndominium. Assume the pad extends 5 feet beyond the building on all sides, which is a common allowance and which your engineer will actually specify. That gives a 70 by 90 pad, 6,300 square feet.
Raise it 12 inches.
6,300 square feet times 1 foot is 6,300 cubic feet, divided by 27, is 233 cubic yards compacted.
| Line item | At the low end | At the high end |
|---|---|---|
| Structural fill at $10 to $30 per cubic yard | $2,330 | $6,990 |
| Delivery, 17 to 24 truckloads at $50 to $150 | $850 | $3,600 |
| Material and delivery | $3,180 | $10,590 |
Placement, moisture conditioning, compaction, and testing are on top of that, and they are quoted locally.
Two things fall out of the arithmetic.
Every additional foot of pad height is another 233 yards. Raise it two feet instead of one and the material line doubles before you have touched anything else. That is why the drainage question above deserves an actual answer rather than a round number.
Testing scales with lifts, not just area. At 6,300 square feet and one test per 2,500 square feet, that is about 3 tests per lift. Twelve inches placed in 8 inch lifts is 2 lifts, so roughly 6 tests. Go to a 24 inch pad and you are at 3 lifts and roughly 9 tests. Budget testing as a function of both dimensions.
What to ask, and who to ask
Your geotechnical engineer or building department:
- What compaction percentage is required here, and against Standard or Modified Proctor?
- What lift thickness is specified for the material we are using?
- What testing frequency do you require, and do you want the reports before foundation inspection?
- How far beyond the building footprint does the pad need to extend?
Your excavation contractor:
- What material are you proposing, and can you show me it passes the gradation and plasticity limits in the geotechnical report?
- What is the shrink factor on that material, and how many loose yards are you ordering for the compacted volume?
- Who is doing the density testing, and is that in your number or mine?
- What is your plan if a lift fails and has to be reworked?
Your post frame builder:
- How is the backfill around the column holes placed and compacted after the pad is signed off?
Question nine is the one nobody asks, and it sits exactly on the seam between two contractors who each believe the other one owns it.
Before the fill arrives
- Establish the required finished floor elevation from the drainage requirement, not from a round number.
- Get the compaction spec in writing with the test method named, Standard or Modified.
- Confirm the fill source and that the material meets the geotechnical report's limits. Free fill is not automatically a saving.
- Ask for the shrink factor and order loose yards accordingly.
- Agree who pays for density testing before the work starts, and agree the frequency.
- Settle in advance who compacts the column backfill and to what standard.
- Keep every field density report. They are your grading certification and your evidence.
- Multiply your pad area by your pad height, divide by 27, and price it before you decide how high to build.
A note on scope
This article is general education for people planning a post frame or barndominium build. Compaction specifications, lift thickness, testing frequency, and drainage requirements are set by your geotechnical report, your adopted building code, and your local building department, and they vary. The 5 percent and 2 percent drainage figures cited are from the model residential code and are superseded by your locally adopted edition and amendments. Cost figures are typical published ranges as of 2026 and vary substantially by market, haul distance, and material availability. The worked example uses an assumed 5 foot pad overbuild for illustration; your engineer specifies the actual dimension.
American Barndos sells architectural design documents. We do not perform geotechnical engineering, specify site work, supervise earthwork, or certify compaction, and our plan sets do not include a site or grading plan.
Ready to look at plans?
Pad cost scales with footprint, and footprint is a decision you make when you choose a plan. A wider building is not just more roof and more slab, it is more compacted fill under all of it, at every foot of elevation you have to build up to drain properly. Browse plans by footprint, clear span, and shop configuration, and download a free watermarked preview to run the pad arithmetic against the site you actually have.
Related reading: Soil bearing capacity and what it costs to guess. Barndominium site prep and slab, in order. Post frame slab thickness, rebar, and vapor barrier.
Sources
Specifications, requirements, and cost figures above are drawn from the following published references, accessed September 2026. All figures are typical published values and are superseded by your geotechnical report, your adopted code, and your local building department.
Gradelog, "Proctor Compaction Test: Complete Field Guide for Contractors": what the Proctor test measures, the Standard versus Modified comparison including compaction energy, hammer weight, drop height and blow counts, maximum dry density and optimum moisture content, the 90 to 95 percent Standard Proctor band for building pads against 98 percent Modified for road base, lift thickness of 6 to 8 inches for fine grained and 12 inches for granular material, and field density test methods. https://gradelog.com/blog/proctor-compaction-test-guide
Dura Land Solutions, "What Is a Building Pad and Why Does It Need to Be Engineered?": the definition of an engineered pad, the unacceptable fill list, lifts of 6 to 8 inches compacted thickness, the 95 percent Standard Proctor residential requirement, the requirement to slope away on all sides, and the consequences of inadequate pad work including cracked slabs, unlevel floors, and doors that stop closing. https://www.duralandsolutions.com/blog/what-is-a-building-pad-engineered
Gradelog, "Positive Drainage Requirements for Residential Grading": IRC R401.3, the 6 inches of fall within the first 10 feet and 5 percent slope, the minimum 2 percent slope beyond 10 feet to the lot line or a swale, the one unit vertical in 20 units horizontal formulation, and application to all sides of the structure. https://gradelog.com/blog/land-development/positive-drainage-requirements-residential
HomeGuide, "2026 Topsoil, Sand and Fill Dirt Delivery Costs": per cubic yard, per ton, and per truckload pricing for standard fill, clean fill, structural and engineered fill and sand and gravel mix, delivery charges and per mile surcharges, spreading labor, and minimum order quantities. https://homeguide.com/costs/fill-dirt-sand-topsoil-cost
Calichi, "Compaction Testing Requirements and Frequency": testing frequency of one test per 2,000 to 5,000 square feet per lift and one per 1,000 to 2,000 square feet in critical zones, at least one test per lift per distinct fill area, the nuclear gauge NRC licensing and certified technician requirement, the stop work and rework sequence on a failing test, and the contents of the daily field report required for grading certification and foundation inspection sign off. https://calichi.com/blog/compaction-testing-requirements-frequency/
Note on the worked example: the 6,300 square foot pad area, the 233 cubic yard volume, the truckload count, and the test counts are calculated here from the dimensions and published unit costs and frequencies in sources four and five, using an assumed 5 foot pad overbuild and a 60 by 80 building. They illustrate the relationships and are not an estimate for any specific project.
Founding list
Join the founding list.
The catalog opens to the founding list first, at founding pricing, before it goes public.