


Construction
Slab and Site Prep, in Order: What Happens Before the Concrete Truck Arrives
Dirt work sets your whole schedule, and it is the one phase you cannot go back and fix. Here is the correct order, who performs each step, and where the money quietly disappears.
Marla Denn — July 25, 2026 — 13 min read
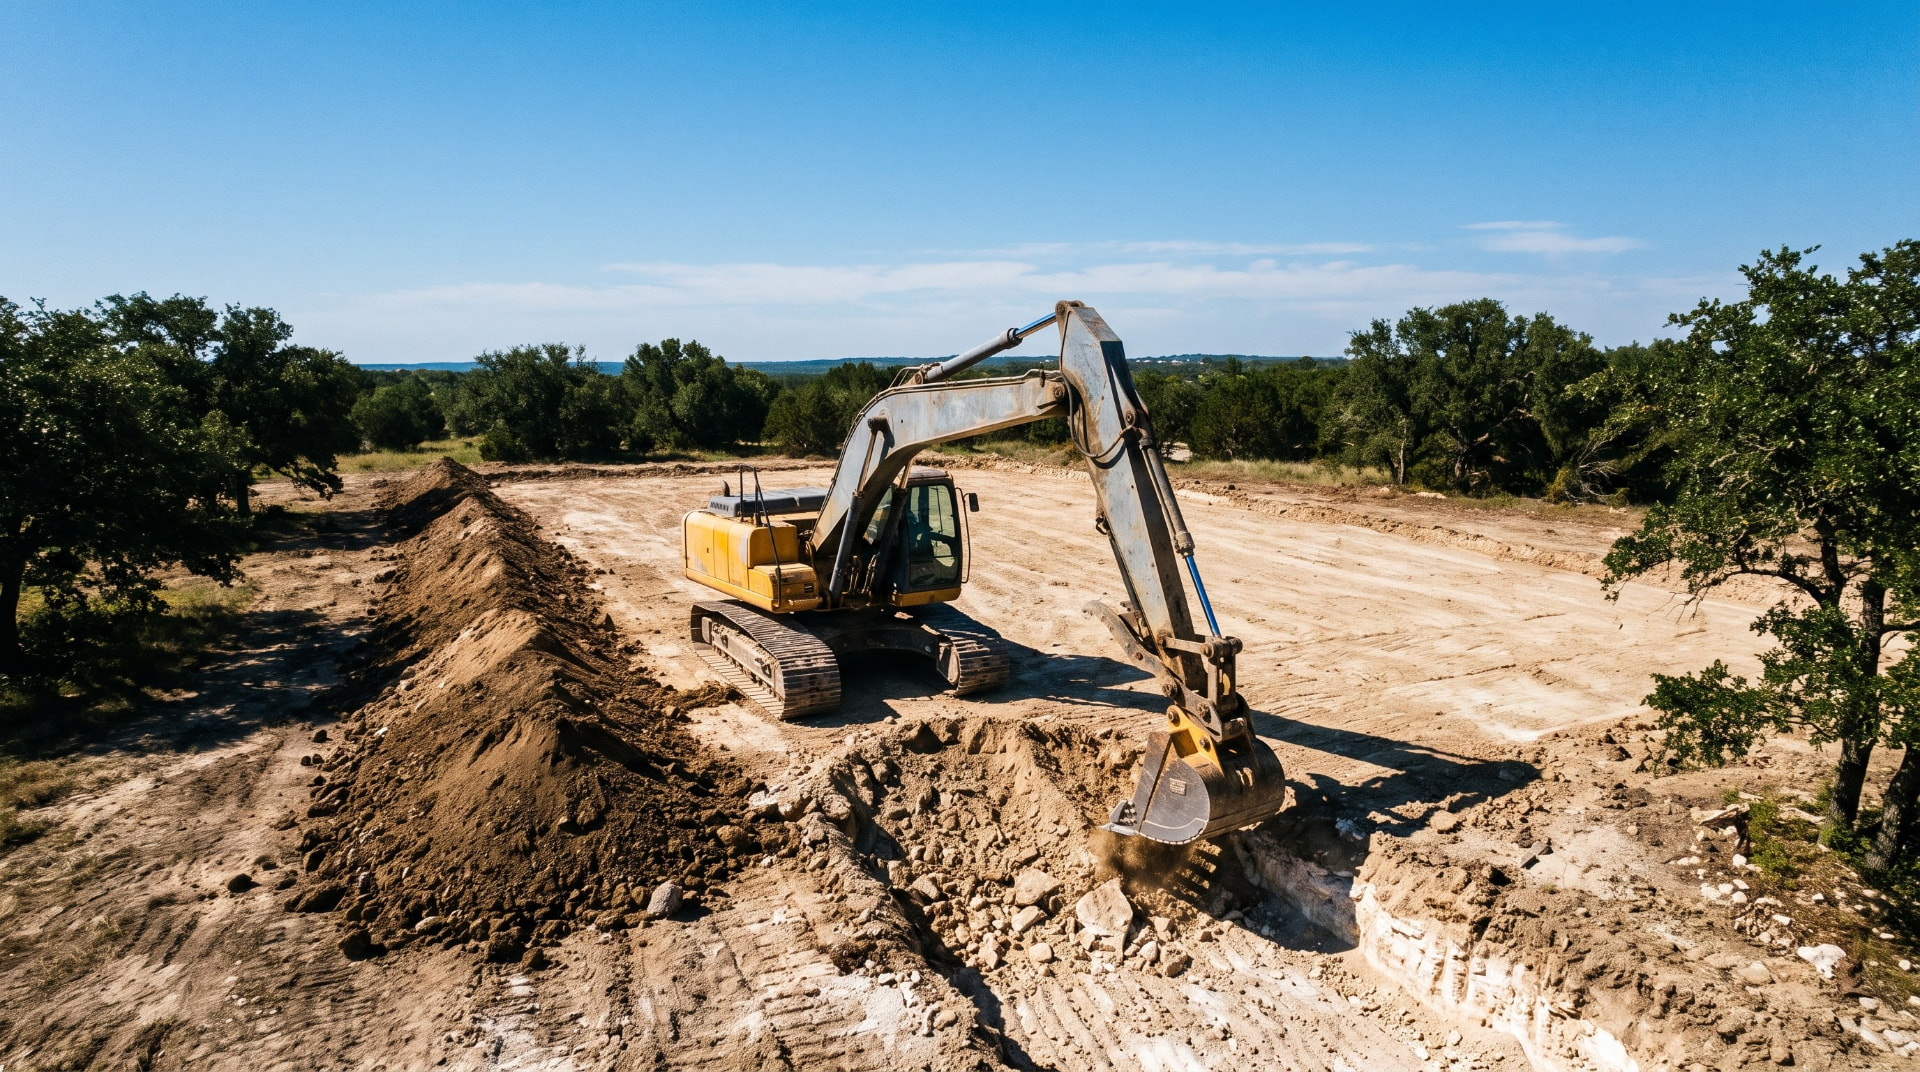
The slab is the only part of your barndominium that becomes permanent the day it is placed. Everything above it can be changed later at some price. A wall can move. A window can be relocated. A roof color can be replaced. The concrete cannot, and neither can the ground underneath it.
That is the entire reason this phase deserves your attention out of proportion to its share of the budget. Site work and the slab together are commonly ten to twenty percent of a finished build, and they carry a much larger share of the risk, because a mistake here does not show up as a line item. It shows up as a crack across your great room two winters after you move in, and there is no sensible repair for it.
This article is the sequence. What happens, in what order, who performs it, what has to be finished before the next thing can start, and where owner builders lose schedule and money. The technical specifications for soil testing, for compaction, and for the slab itself each have their own article, and this one links to them rather than repeating them.
The sequence at a glance
Table 1. Site work and slab, in order.
| Step | What happens | Who typically performs it | Typical duration |
|---|---|---|---|
| 1 | Boundary survey and corner staking | Licensed land surveyor | 1 to 2 weeks to schedule, 1 day on site |
| 2 | Soil investigation | Geotechnical firm or soils engineer | 1 to 3 weeks to schedule, 1 day on site |
| 3 | Permits and erosion control plan | You, your designer, or your excavator | 3 to 8 weeks |
| 4 | Install erosion control | Excavator | 1 day |
| 5 | Clear, grub, and strip topsoil | Excavator | 2 to 5 days |
| 6 | Rough grade and establish pad elevation | Excavator | 2 to 5 days |
| 7 | Build the pad in lifts, compact each lift | Excavator, with third party density testing | 3 to 10 days |
| 8 | Trench and stub under slab utilities | Plumber, electrician, excavator | 3 to 7 days |
| 9 | Form, place vapor barrier, set reinforcement, rough in radiant | Concrete contractor, radiant installer | 3 to 5 days |
| 10 | Inspection | Building department | Scheduled, often 24 to 72 hours notice |
| 11 | Place, finish, and cure | Concrete contractor | 1 day to place, 7 days to cure |
Reading that table, notice how much of the calendar is scheduling rather than work. The physical labor in this phase is a few weeks. The elapsed time is commonly two to four months, and almost all of the difference is waiting on other people. That gap is the single most useful thing to understand before you start.
Step 1: Survey before anything else
You need to know exactly where your property lines are before you decide where anything goes. Not approximately. Exactly.
A boundary survey establishes your corners and, if you order it, locates recorded easements. Easements matter here because you cannot build on one, and people discover utility and access easements running through the middle of their intended building site with distressing regularity.
Have the surveyor stake the building corners once you know where the structure goes. Those stakes are what your excavator works from, and a building that ends up three feet closer to a side line than the setback allows is a problem measured in variances and legal fees.
Step 2: Soil investigation, before you fall in love with a layout
A soil investigation tells you what the ground will carry and what is under it. If the answer is unfavorable, everything downstream changes: your foundation design, your fill quantity, your pad cost, and occasionally whether the building goes somewhere else on the lot entirely.
Skipping this to save a few hundred dollars is the most expensive shortcut available in residential construction. A geotechnical evaluation commonly runs $1,500 to $8,000 depending on the number of borings and the complexity of the site. Compare that to the cost of discovering expansive clay after the pad is built.
Two notes on sequencing. First, this is a different test from your perc test, though people often schedule them together to save a mobilization fee, which is a good idea. Second, if you are on a site with any history of fill, any slope, or any nearby water, treat the soil report as mandatory rather than optional regardless of what your county requires.
For what the test actually measures and how to read the report, see our article on soil tests and bearing capacity.
Step 3: Permits and erosion control, which take longer than you think
You will likely need more than one permit, and they do not all come from the same office.
A building permit covers the structure. A grading or land disturbance permit covers moving dirt, and many jurisdictions require it separately. If your disturbed area exceeds one acre, federal stormwater rules generally require a permit and a stormwater pollution prevention plan. Wetland permits apply where they apply, and finding out you are in a mapped wetland after clearing is a genuinely bad day.
Permitting commonly runs three to eight weeks and costs anywhere from about $1,000 to $15,000 depending on jurisdiction and project size. Survey work adds roughly $1,000 to $5,000.
The mistake to avoid is treating permitting as something that happens in parallel with dirt work. In most jurisdictions, disturbing ground before your grading permit is issued is a violation with a stop work order attached, and a stop work order in the middle of an open excavation during a wet week is expensive in a way that has nothing to do with the fine.
Step 4 and 5: Erosion control, clearing, grubbing, stripping
Erosion control goes in first, before clearing. Silt fence, inlet protection, and a stabilized construction entrance. Inspectors check for it, and the stabilized entrance is genuinely useful rather than bureaucratic, because it keeps your access from turning into a rut field the first time it rains.
Then clearing and grubbing. Clearing removes vegetation above ground. Grubbing removes the roots and stumps below it. Both matter, and grubbing is the one people underestimate. Organic material left under a building pad decomposes, loses volume, and settles, which is exactly the failure you are trying to prevent.
Stripping removes the topsoil layer, which is organic and compressible and cannot be built on. Stockpile it somewhere out of the way rather than hauling it off. You will want it for final grading and landscaping, and buying topsoil back later is an avoidable cost.
Clearing and demolition commonly runs $2,000 to $20,000. Excavation and earthmoving runs $3,000 to $30,000 and up. Both figures move enormously with how wooded your site is and how far material has to travel.
Step 6: Pad elevation, the decision that shapes the whole site
This is the highest leverage decision in the phase and it takes ten minutes to make.
Your finished floor should sit above the surrounding grade so that water leaves the building rather than approaching it. Six to twelve inches above the highest adjacent grade is a common target, and more is appropriate on a flat lot, on clay, or anywhere water is slow to move.
Set the number before dirt moves, write it down, and hold it with a laser level rather than an eyeball. Everything else on the site references this elevation: the driveway approach, the door thresholds, the drainage swales, the septic field, and where water sits after a three inch rain.
Raising a pad after the fact means importing and compacting more fill, which is the most expensive way to buy elevation. Lowering one is worse.
One coordination note specific to barndominiums. If you are planning overhead doors on the shop side, the approach grade to those doors is a real design problem when the pad is high. A twelve inch pad with a steep approach makes a trailer scrape. Solve this on paper, with your excavator, before the pad is built.
Step 7: Building the pad
Fill goes in thin layers, called lifts, and each one gets compacted before the next goes on top. Fill placed in one deep lift does not compact, no matter what equipment sits on it.
The reason this matters to you as the owner: under compacted fill keeps consolidating under the weight of the building, and consolidating fill is how slabs crack and floors go out of level. It is not a cosmetic problem and it is not repairable at a sensible price.
The one thing to insist on, regardless of what your county requires: pay for third party compaction testing on engineered fill. It costs a few hundred dollars per test. It produces a document. That document is your only proof that the ground under your house was built correctly, and it is worth having when you sell.
For lift thickness, Proctor testing, percent compaction targets, and moisture content, see our article on pad elevation and compaction.
Grading and compaction as a phase commonly runs $2,000 to $15,000.
Step 8: Everything that goes under the slab goes in now
This is the rule that pays for itself more than any other rule in this article.
Anything you might ever want beneath your slab has to be there before the pour. Not most of it. All of it.
- Plumbing drains and supply stubs
- Radiant tubing if there is any chance you will ever want radiant heat
- Electrical conduit to islands, floor outlets, and future locations
- A spare conduit to the shop side for a future subpanel
- A sleeve under the driveway for future irrigation, lighting, or a gate
- Conduit for low voltage, network, or a future generator transfer switch
- Any floor drains, and their slope
A two inch conduit costs about twenty dollars and ten minutes today. Cutting the same path into a finished slab later costs hundreds of dollars, makes dust through your entire house, and leaves a permanent patch in your floor.
Walk the plan with your plumber and electrician while the pad is open, with your actual furniture layout in hand. Then walk it again.
Step 9 and 10: Forming, prep, and the inspection
The concrete contractor forms the slab, places the vapor barrier, sets reinforcement, and coordinates the radiant installer if you are using radiant.
Two things belong in your head rather than in the details, which live in our article on slab basics.
Reinforcement only works where it ends up. Rebar sitting on chairs in the middle third of the slab does its job. Welded wire mesh that ends up pressed into the bottom of the pour does nothing at all. If you walk the site the day before the pour and the steel is lying on the ground, that is the conversation to have, and it is much easier before the trucks are ordered.
Radiant loops should be pressurized before the pour, with a gauge left visible during placement. If a line gets punctured by a boot or a rake, the gauge tells you immediately, while it is still fixable.
Then the inspection. Most jurisdictions require a pre pour inspection covering the vapor barrier, reinforcement, and under slab utilities. Schedule it with the inspector's actual availability in mind, not with your ideal calendar, and understand that a failed inspection means the pour does not happen that day and possibly not that week.
Step 11: The pour, the finish, and the cure
Placement is one day. Curing is seven, and curing is where a surprising amount of quality is won or lost.
Concrete does not dry. It cures, through a chemical reaction that requires moisture and time. A slab that loses its water too fast to sun or wind ends up with a weak surface that crazes and dusts for the life of the building.
Seven days of moist curing gets you most of the strength you already paid for. Cure blankets in cold weather, water or a curing compound in the heat.
Control joints get cut or tooled within roughly twelve hours of placement. Concrete is going to crack. Joints decide where it cracks, and a slab without them cracks wherever it wants, which is usually the middle of the room you care about most.
Weather is a schedule input, not an inconvenience
Do not place concrete below 40 degrees and falling without a cold weather plan, meaning heated water, an accelerator, and blankets. Do not place on a 95 degree afternoon with wind and no plan for evaporation.
A good finishing crew can work around weather. Nobody can undo it.
This is why the whole phase belongs in the right part of your calendar. In most of the country, running site work in the spring and pouring in early summer removes an entire category of risk. Pouring in November because the permit finally came through is how people end up with a compromise slab.
What has to be finished before the next thing starts
Owner builders lose the most time to dependency errors, meaning scheduling a trade to arrive before its predecessor is genuinely finished. This table is the answer.
Table 2. Dependencies.
| Before this can start | This must be complete |
|---|---|
| Any dirt work | Grading permit issued, erosion control installed |
| Pad construction | Clearing, grubbing, topsoil stripped, pad elevation set in writing |
| Under slab utilities | Pad built and compaction tested, plumbing layout confirmed against final floor plan |
| Forming | Utilities stubbed, inspected where required, and photographed |
| Pre pour inspection | Vapor barrier, reinforcement on chairs, radiant pressurized |
| Concrete placement | Inspection passed, weather window confirmed, finishing crew confirmed |
| Shell erection | Slab cured to the strength the erector requires, anchor bolt locations verified |
That last row is worth reading twice. Your shell erector has a required cure time and an anchor bolt tolerance, and both are their requirement rather than yours. Ask for both in writing before the pour, because anchor bolts in the wrong place are a genuinely serious problem in a pre engineered steel building.
Who you are actually hiring, and the gap between them
Most owner builders assume this phase is one contractor. It is usually four, and the seams between them are where problems live.
Table 3. The four parties and what each one is responsible for.
| Party | Responsible for | Not responsible for |
|---|---|---|
| Land surveyor | Boundary, corners, easements, elevations | Whether your building fits the setbacks |
| Geotechnical firm | What the soil will carry and what is under it | Designing your foundation |
| Excavator | Clearing, grading, fill, compaction, drainage | Whether the pad elevation was the right elevation |
| Concrete contractor | Forms, barrier, steel, placement, finish, cure | What is underneath the slab |
Look at the right hand column. Every one of those gaps belongs to somebody, and if you are general contracting your own build, that somebody is you.
The most common and most expensive gap is between the excavator and the concrete contractor. The excavator builds the pad. The concrete contractor pours on it. Neither one is contractually responsible for whether the pad was built to the specification the slab needs. Close that gap explicitly: give the excavator the compaction specification in writing, get the density test results, and hand those results to the concrete contractor before they form anything.
What this phase costs
Table 4. Typical 2026 cost ranges by phase.
| Phase | Typical range |
|---|---|
| Geotechnical evaluation and soil testing | $1,500 to $8,000 |
| Survey | $1,000 to $5,000 |
| Permits | $1,000 to $15,000 |
| Demolition and clearing | $2,000 to $20,000 |
| Excavation and earthmoving | $3,000 to $30,000 and up |
| Grading and compaction | $2,000 to $15,000 |
| Utility installation and drainage | $5,000 to $50,000 |
| Final surfacing | $2,000 to $8,000 |
| Total, standard residential, 1,500 to 3,000 sq ft | $15,000 to $35,000 |
| Total, large residential, 3,000 sq ft and up | $35,000 to $75,000 and up |
Separately, a turnkey slab including pad prep, vapor barrier, reinforcement, and finish commonly runs $8 to $16 per square foot. Deep fill, poor soil, or difficult access moves past that quickly.
Two warnings about these numbers. They are national ranges and your county is not national. And site work is the single most variable cost in residential construction, which is why every experienced person you talk to will tell you to get it bid rather than estimated.
The five sequencing mistakes that cost the most
- Moving dirt before the grading permit is issued. Stop work orders are expensive in ways the fine does not capture.
- Setting pad elevation by eye. Ten minutes of decision that determines drainage for the life of the building.
- Skipping compaction testing. A few hundred dollars for the only documentation that the ground was built right.
- Forgetting a conduit. Twenty dollars now, hundreds and a permanent floor patch later.
- Pouring on a schedule instead of in a weather window. A finisher can work around weather. Nobody can undo it.
Questions to ask before dirt moves
- Do I need a separate grading or land disturbance permit, and how long is the current review time?
- Is my disturbed area over one acre, and does that trigger a stormwater permit?
- What compaction specification does my foundation design assume, and who is testing it?
- What is my finished floor elevation relative to the highest adjacent grade, and who is holding that number?
- What cure time and anchor bolt tolerance does my shell erector require?
- Who is responsible for verifying the pad before the concrete contractor forms on it?
- What is excluded from the excavator's number, specifically regarding rock, water, and haul off?
Write the answers down. The last one is where site work budgets go wrong most often.
What to do next
Get the survey and the soil test scheduled first, because both have lead times and both change decisions downstream. While you wait, call your building department and ask the permit questions above.
Then set your pad elevation with your excavator standing on the lot, and get the compaction specification in writing before anyone quotes the work.
If you have not settled on a plan yet, this is the right order: soil first, then site plan, then house plan. The building fits the lot. The lot does not get to be rearranged around the building.
A note on scope
This article is general education for homeowners planning a barndominium build. Permitting requirements, erosion control rules, compaction specifications, and foundation design are set by your jurisdiction and by the engineer of record for your project. Nothing here substitutes for your building department, a licensed geotechnical or structural engineer, or contractors who have looked at your site. Costs are typical published ranges as of 2026 and vary substantially by market, site condition, and access.
American Barndos sells architectural design documents. We are not a general contractor, and our plan sets do not include a geotechnical report, a site plan, or a foundation design engineered for your specific soil.
Related reading
- Soil tests and bearing capacity
- Pad elevation and compaction
- Slab basics for post frame homes
- Your perc test decides where the house goes
- Ten ways an owner built barndominium goes over budget
Sources
Cost ranges, phase sequencing, compaction standards, and permit thresholds in this article are drawn from the following published references, accessed August 2026. All figures are national typical ranges and are superseded by local bids and by your project's geotechnical report.
HBG Civil, "Site Preparation Guide 2026: Steps, Costs and Expert Checklist": the ordered phases of residential site preparation, per phase cost ranges, total residential project ranges by size, required permit types including the one acre stormwater threshold, and typical phase durations. https://www.hbgcivil.com/site-preparation-guide-2026-steps-costs-checklist/
Soil Depot, "Soil Compaction: Proctor, Lifts and 95% Density": what a Proctor test measures, standard versus modified Proctor and their ASTM references, typical percent compaction targets for residential slabs and structural fill, lift thickness guidance, optimum moisture content, and the consequences of under compaction. https://soil-depot.com/resources/soil-compaction-explained/
Gradelog, "Proctor Compaction Test: Complete Field Guide for Contractors": field testing procedure and how density results are reported. https://gradelog.com/blog/proctor-compaction-test-guide
Dura Land Solutions, "What Is a Building Pad and Why Does It Need to Be Engineered?": engineered building pad construction and why organic material must be removed before fill placement. https://www.duralandsolutions.com/blog/what-is-a-building-pad-engineered
Calichi, "Compaction Testing Requirements and Frequency": third party density testing frequency and documentation practice. https://calichi.com/blog/compaction-testing-requirements-frequency/
Note on the cost figures: published site preparation ranges vary widely between sources because site work is the least standardized cost in residential construction. The ranges above are reported as published rather than reconciled. Treat them as a sanity check on a local bid, never as a substitute for one.
Founding list
Join the founding list.
The catalog opens to the founding list first, at founding pricing, before it goes public.
Keep reading
- ConstructionIn a Post Frame Building, Bad Compaction Does Not Fail the Building. It Fails the Floor.
- ConstructionIn post frame you pour the floor last, inside a finished building, and everything under it is permanent
- ConstructionYour Steel Skin Is a Vapor Barrier on the Cold Side, Which Is Exactly the Wrong Place for One